Tuesday, February 24th, 2015

Hot Potato

IMG_4951If you haven’t been lucky enough yet to encounter a Japanese sweet potato, I urge you to seek them out, especially if you’re a fan of the traditional American variety. The Japanese variety—which I find at my nearby Asian supermarket but I’ve also seen at Whole Food- is smaller and sweeter than a yam, with a yellow-flesh interior and a redder skin, they’re also usually smaller in overall size. You can prepare them however you’d normally prepare your sweet potatoes, but lately I’ve been steaming them (faster than roasting), followed by a quick sear and then coating with a miso-vinaigrette. The idea came from the wonderful book Vegetable Literacy by Deborah Madison, and ever since I discovered her recipe I’ve been doing nothing else. Actually I’ve been doing a lot more steaming in general lately because it’s just a quick and easy way to prepare vegetables without the fuss of a big pot of water or waiting for the oven to warm up to 400 degrees. Also, in the case of vegetables like beets, it keeps all the nutrients locked in.

TO STEAM and COOK: Scrub the potatoes and steam them whole with the skins on over boiling water (For a makeshift steamer I just stick a colander inside of a large pot and fill the bottom with about an inch of water). You’ll know the potatoes are done because you can easily pierce them with a pointed knife—it should take about 20 minutes to cook through, depending on how large the potatoes are. Remove the potatoes and let them cool a bit before cutting them in half, then sear them cut side down in a skillet slicked with a bit of peanut or sunflower oil, just enough so that they get a bit of a crust.

IMG_4935

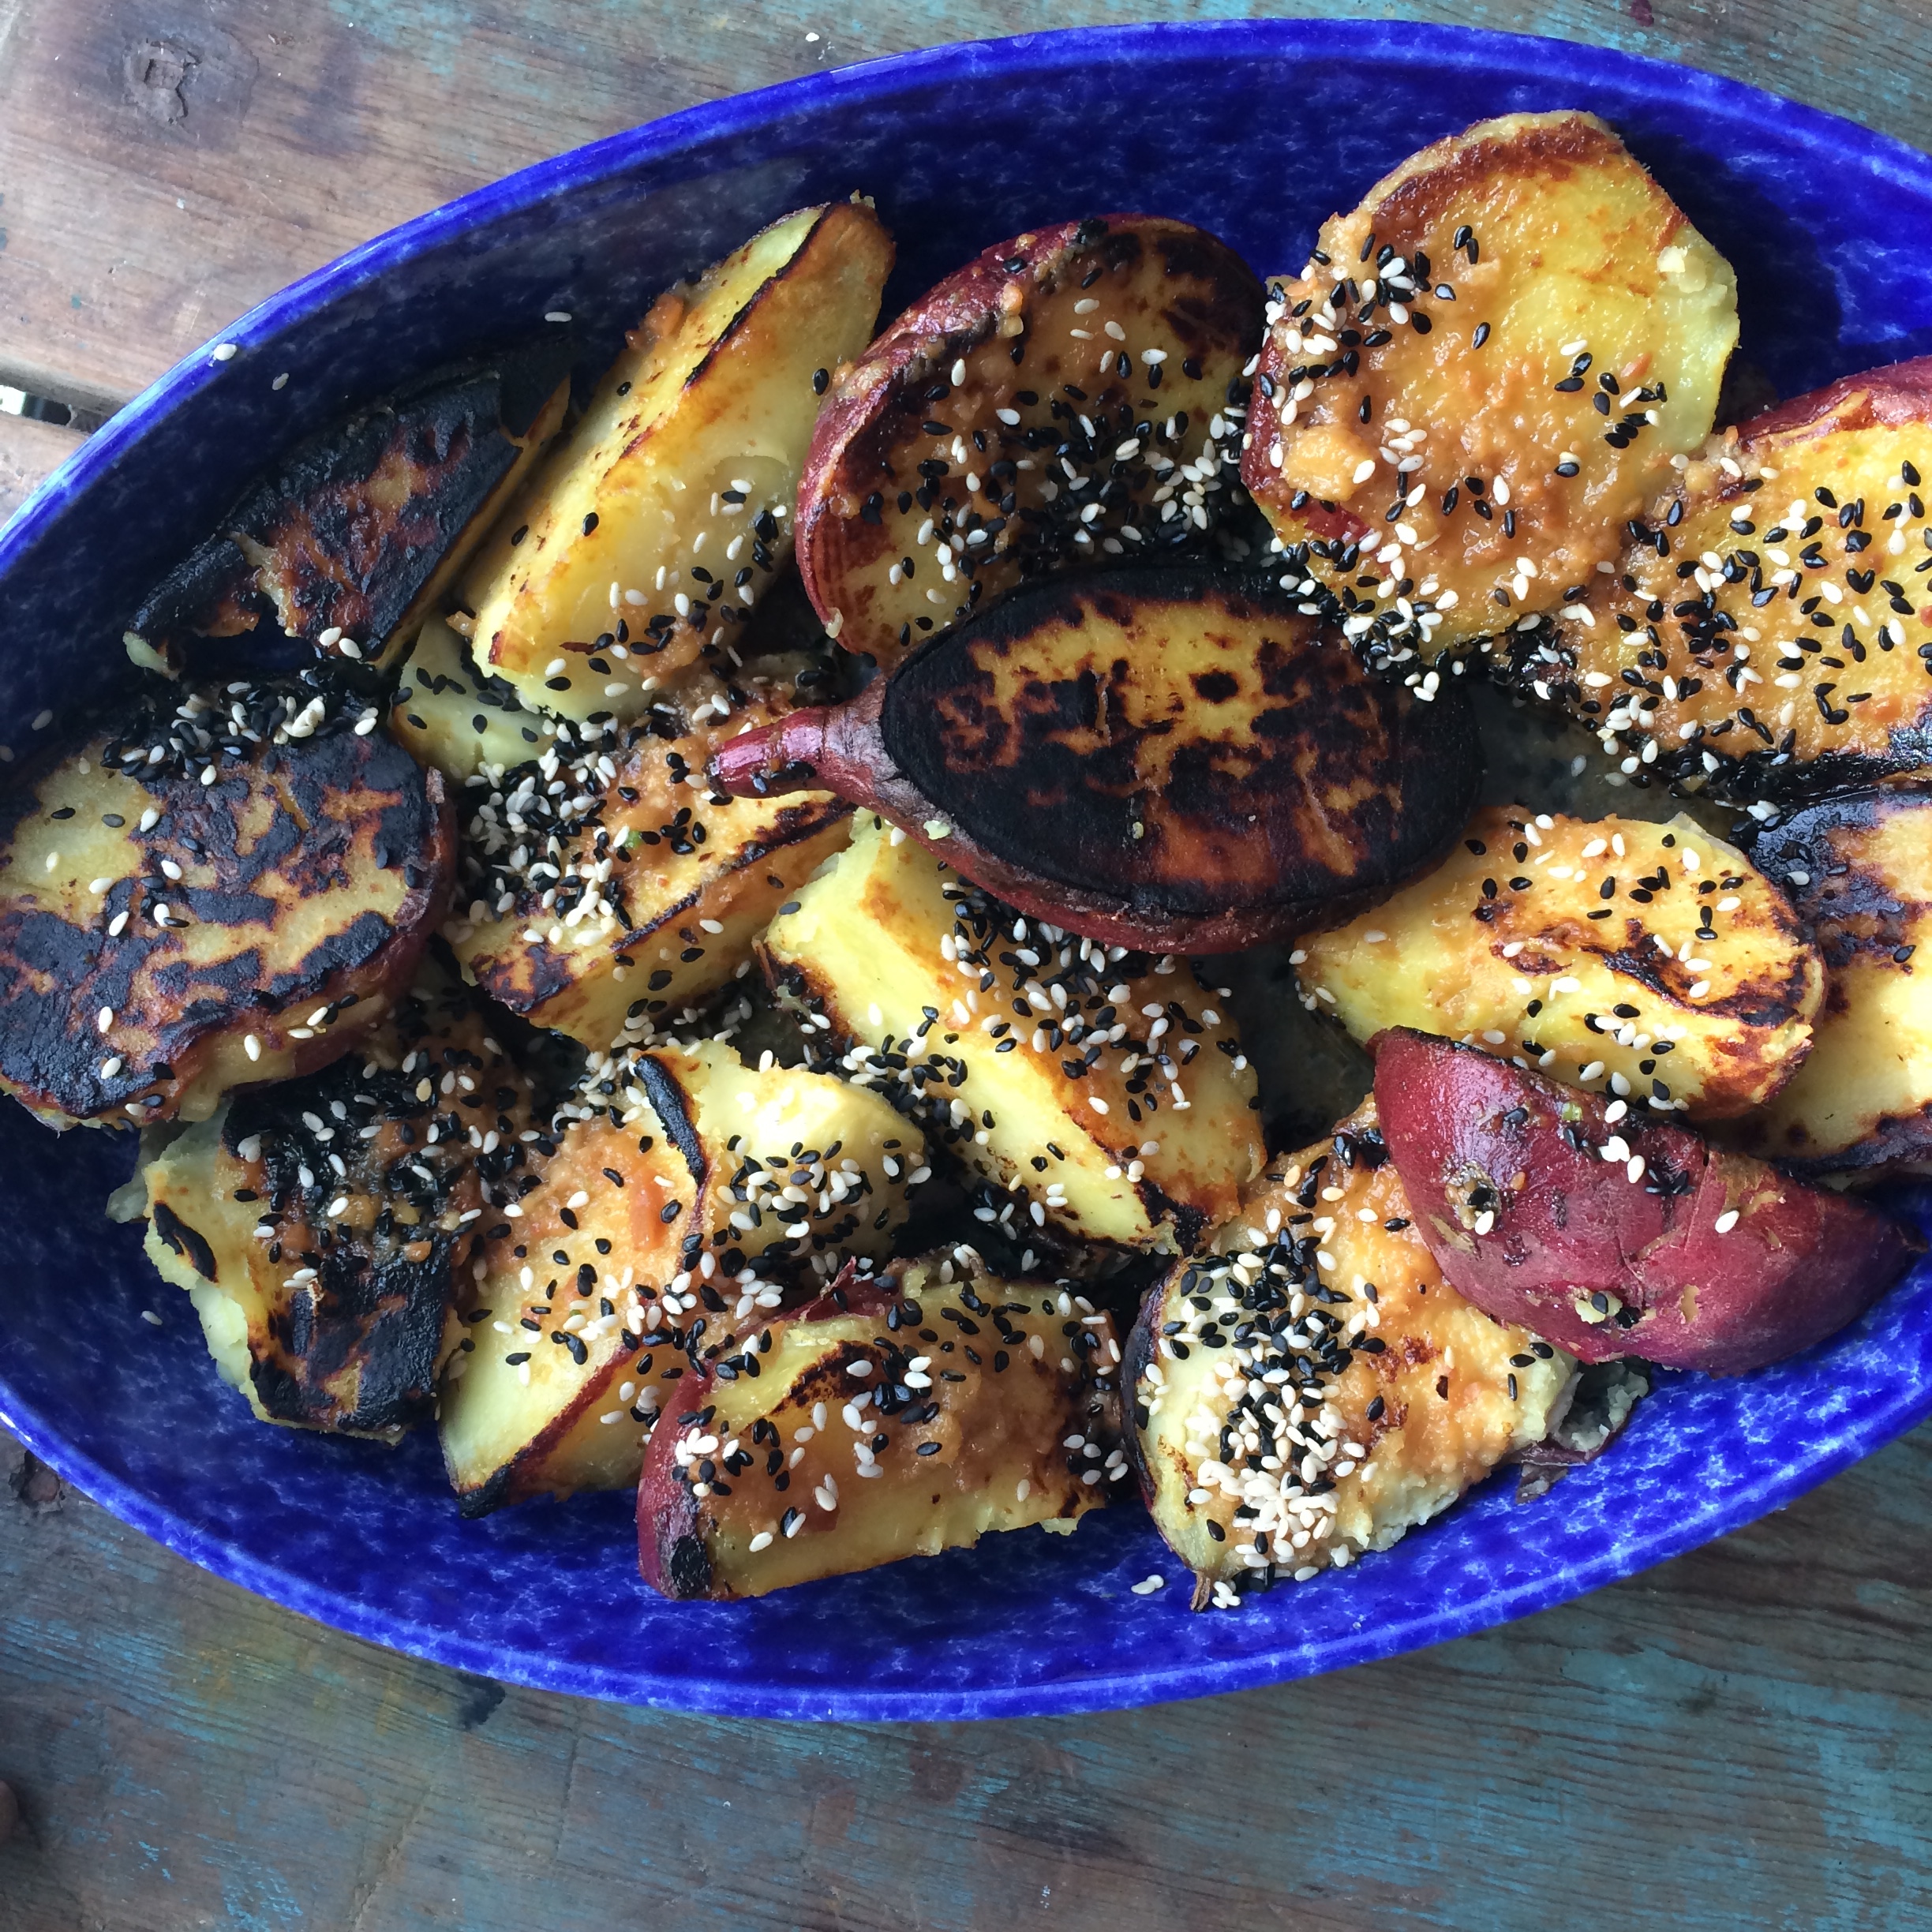
You can happily eat the potatoes just like this, drizzled with a little sesame oil, some rice vinegar or ponzu sauce, and a sprinkling of sesame seeds. But, if you want to make them AMAZING, make this miso-dressing and brush it all over the sweet potatoes while they’re still warm:

TO MAKE THE MISO-DRESSING: In a jar combine 1 big spoonful of white or yellow miso paste; 1 tsp (or so) of ginger, grated or minced; 1 garlic clove, pressed or minced; a splash of soy sauce; a drizzle of agave or honey; then fill the jar 1/3 of the way with rice wine vinegar; 1/3 of the way with sesame oil; and the last 1/3 of the way with grapeseed or canola oil. Shake well to combine then taste to see if it needs a bit more acid or sweetener. Brush on your warm potatoes and then sprinkle them liberally with sesame seeds. Save any remaining sauce for salads or to top grains.

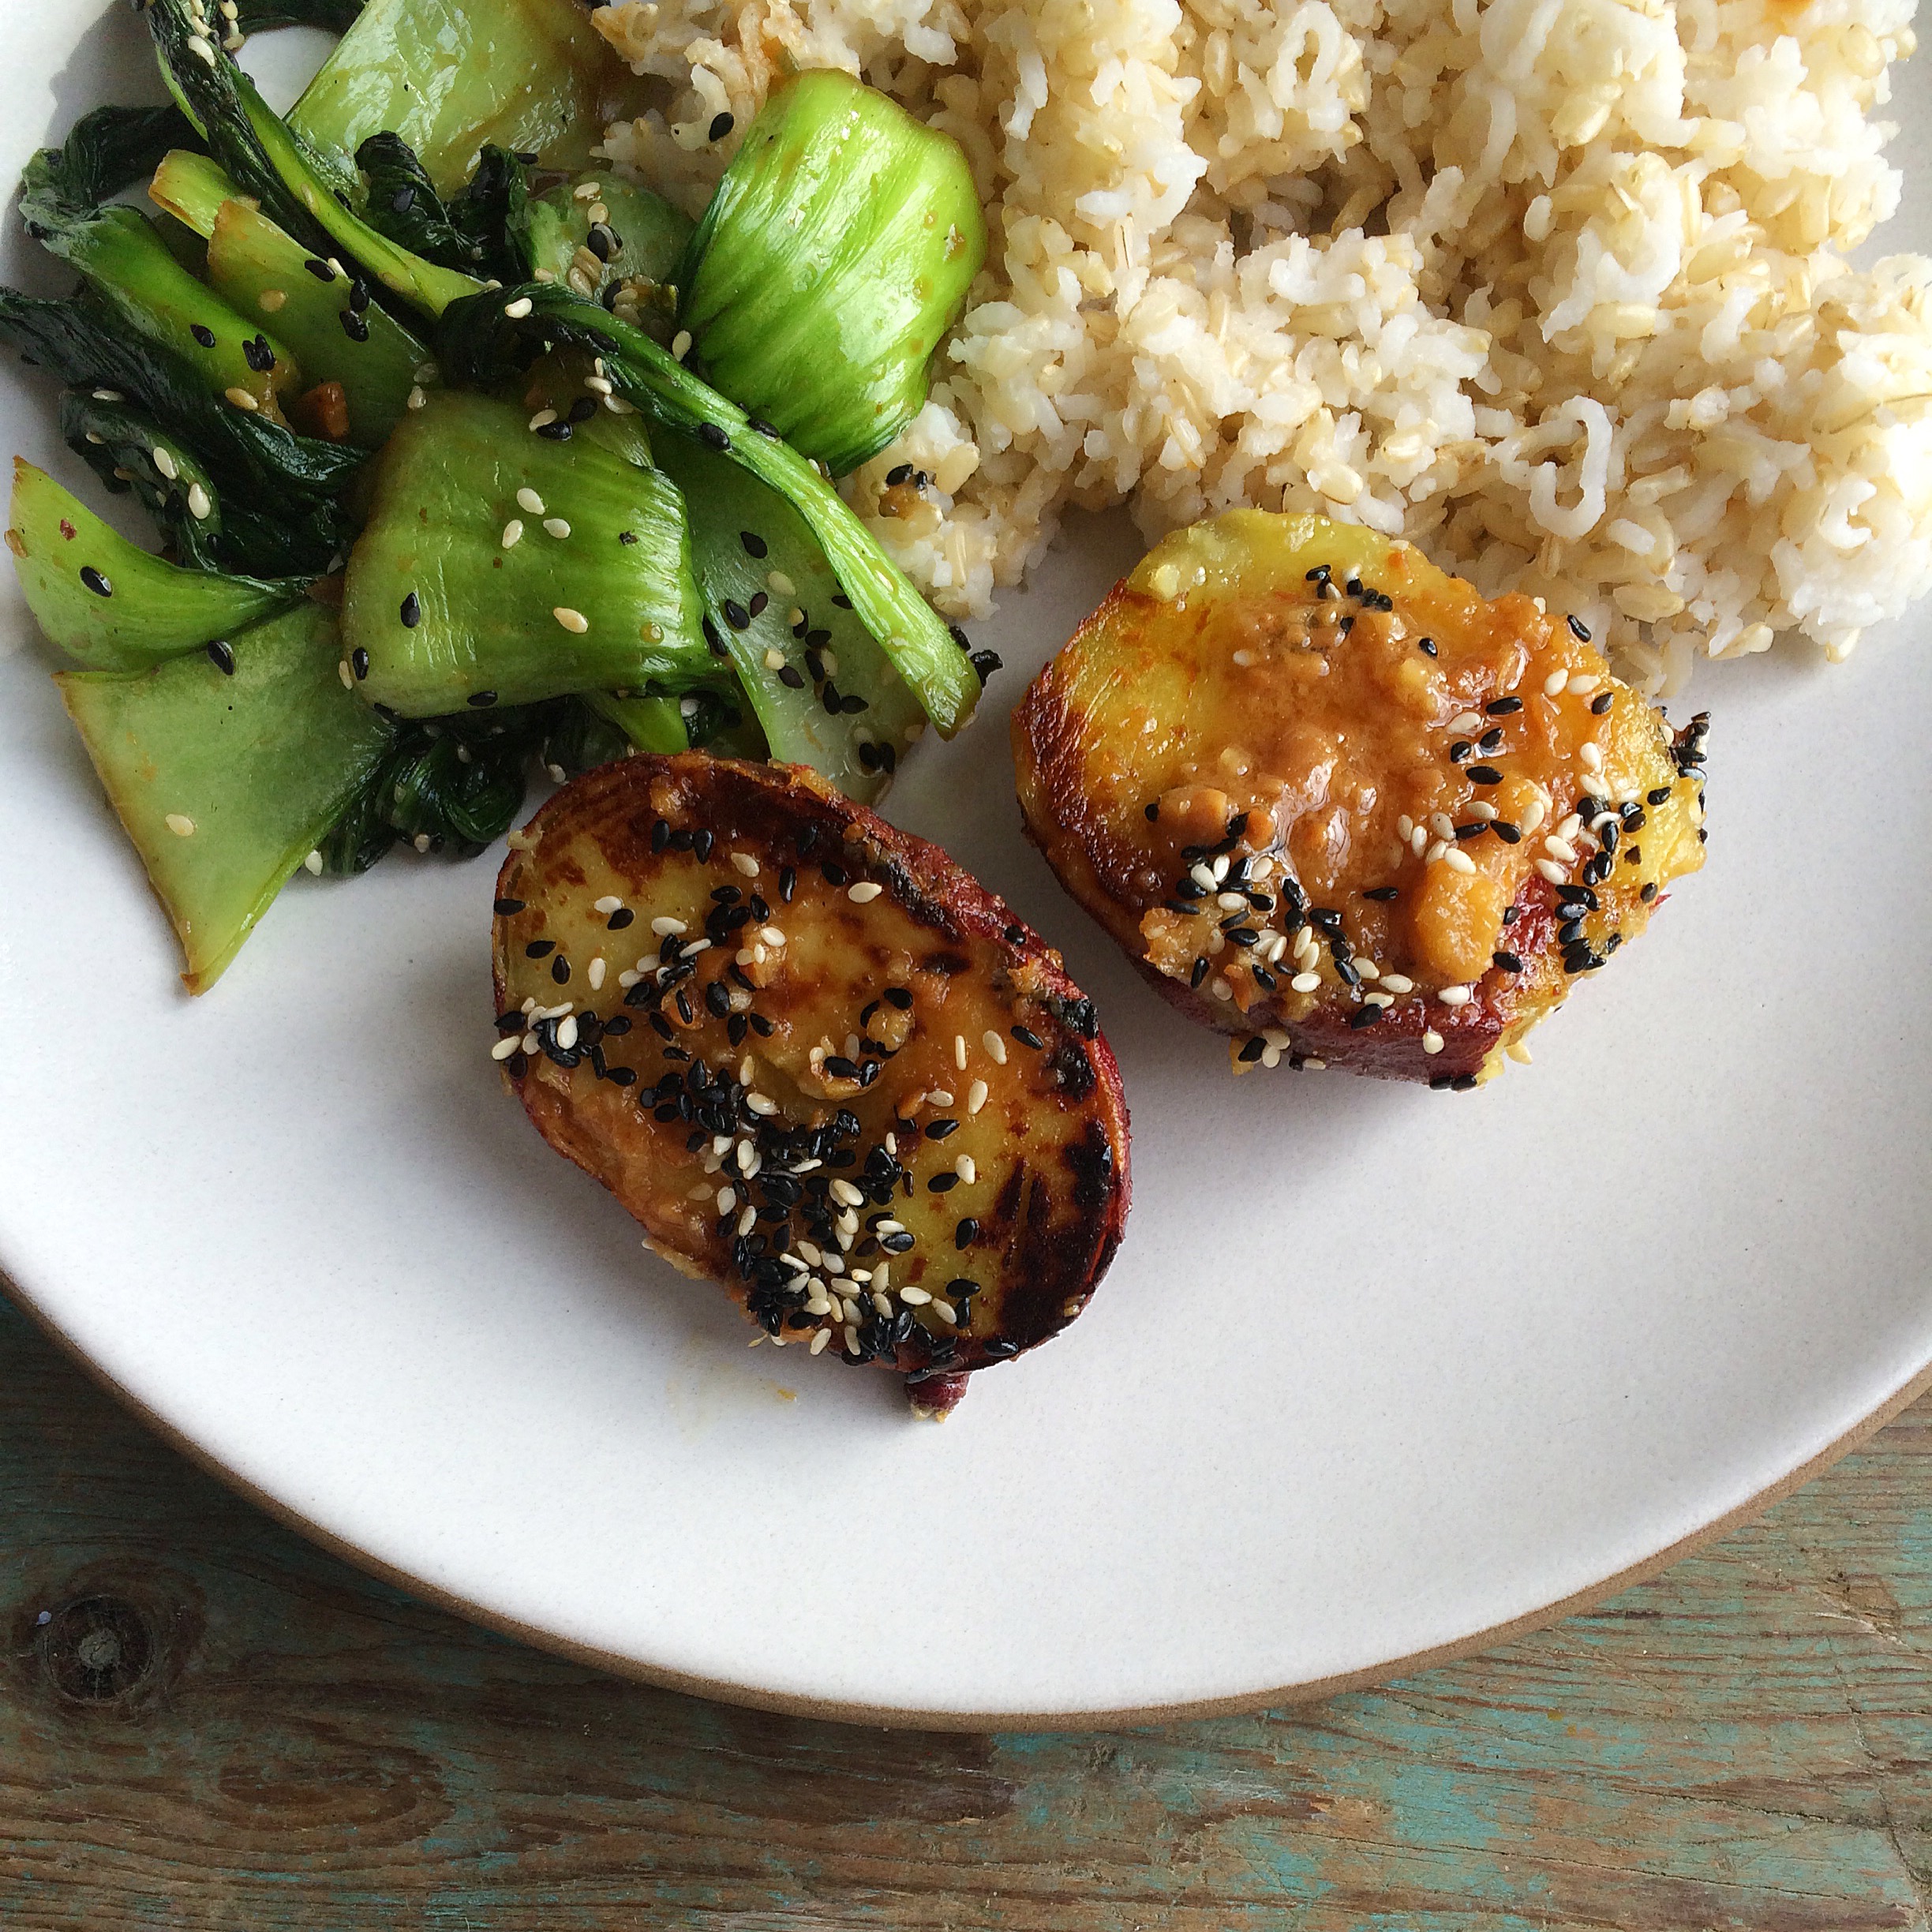
For a quick meal, I like to serve the potatoes with brown rice and whatever green vegetable I have on hand, say broccoli or spinach (above is bok choy) that I stir-fry or, you guessed it, steamed.

Enjoy!


Enjoy!


Read More

Comments Off on Hot Potato
Thursday, February 12th, 2015

Things I Like: Melted Rainbow Crayon Hearts!

IMG_4753
I just had to share this Valentine’s Day craft idea that I stole from my friend Isabel and I think she may have discovered on Pinterest (that wonderful time-sucking rabbit hole). This was a lifesaver for me because I tend to drop the ball when it comes to school Valentine’s projects. Like EVERYTHING kid-related, the Valentine’s card game has become much more elevated since I was a student at Clinton Elementary School. Back then, your mom bought a box of cartoon character cards at the supermarket, you wrote the name of each kid in your class on the cheap little envelope, delivered them on the big day, got the same in return, done and done. But now, supermarket Valentine’s are like you’re not even trying. Handmade cards, candy-grams, monogrammed pink pencils, origami hearts, …it’s crazy. I always feel like I completely drop the ball. But not this year because of these melted crayon hearts!
IMG_4773

IMG_4794It’s easy enough for someone who doesn’t have the Martha Stewart gene (no glue-gun required) but there’s enough busy work upfront that you feel like you and the kids are actually MAKING something. The only thing required is a silicone heart mold that I hear you can find at many craft shops like Michael’s.

Gather up a bunch of old crayons (this is a perfect project for using up old and banged-up crayons, please don’t go out and buy a box of new ones unless you’re an oil oligarch or something) and start peeling off the labels (this is the most onerous part of the job). Break them into smaller pieces and inset the pieces into the molds, mixing colors as you like. I recommend not using any black or brown or gray because they are less than cheerful and will muddy the mixture. We went with blues, and greens, and pinks, and purples, and oranges, and yellows…even better were adding some fluorescent colors that really pop. On one site I saw a mom add glitter as well which is definitely a pro-move.

Once each heart is filled, place the mold on a baking sheet and put it in a pre-heated oven at 250. Mine were done at around the 15 minute mark—completely melted, no chunks floating around—but I would check them at around 12 minutes. Place the sheet with the mold on a cooling rack and let cool until the crayons harden (this should only take 30 minutes or so). Pop the cooled crayons out and you’re done!

*One warning: some kids might mistake the colorful heart for candy so consider including a little instruction in your Valentine…

Read More

Comments Off on Things I Like: Melted Rainbow Crayon Hearts!
Wednesday, February 4th, 2015

An Everyday Citrus Salad

IMG_4416During this frigid season, I find it’s easy to fall prey to “winter eating”, what I classify as the satisfying habit of loading myself up with lovely carbohydrates like homemade pizzas, pasta tossed with meaty ragu sauce and a flurry of grated parmesean, chickens roasted on top of little potatoes that can luxuriate in the drippings, and ribs slowly braised in wine until the meat falls off the bone…you get the idea. Basically the opposite of “spa cooking”, and more like what a bear eats before he enters his den for to hibernate. These stick-to-the ribs dishes really do warm the body and soul when your environment has turned icy and raw: When you have lost yet another glove, scraped yet another car of it’s glacial crust, and piled on yet another wooly sweater. In the midst of winter survival, hibernation cooking seems like the least you can do for yourself.

But like everything in life, there needs to be a balance, yes? No one wants to wake up one day in April and resemble a mama grizzly. So in the midst of this hearty binging I find myself craving citrus. Bright flavors and colors that burst on the tongue and wake-up the senses. For a quick fix I can always squeeze one of my beloved pink grapefruits for a shot of sunshine. If I have a bit more time though, I will make a citrus salad. This is something new to me because assembling a salad of citrus wedges (which normally requires that you “supreme” the fruit, removing the juicy flesh as a whole from the skins that surround it) seemed very chef-y and busy and something a spa-cookbook would have you do like you have the time to go supreming things. Finally though, my craving overwhelmed my prejudices, and since there’s no where around me serving up a delightful citrus salad, I decided it was time to make it myself.

My first step was to gather a selection of different citrus (and side note: the citrus has been really top-notch this year, at least in my neck of the woods, how about you?). I like to have on hand the following: pink grapefruit, navel oranges, and tangerines.

You can remove the flesh the traditional way by cutting off the rind and white pith around the fruit, then slicing the juicy segments away from the aforementioned skin. If you’d like a visual how-to HERE is a good video to watch. Make sure your knife is sharp (it will be safer than using a dull knife) and to go carefully. In the video, the dude holds the orange in his hand to carve out the segments, but unless you’re very confident with your knife skills, I suggest placing it on the table and holding it in place with your hand while carving out the segments. When you’re done, make sure you reserve the juice squeezed from the leftover pith/skins to make your vinaigrette.

RECIPE for WINTER CITRUS SALAD

IMG_4423To dress my salad: I take the leftover juice, place it in a bowl or clean jam jar and add the same amount of apple cider or white wine vinegar. I then add grapeseed oil (I like grapeseed versus olive oil because it doesn’t change the flavor of the fruit; use the same amount as you already have in the bowl of the juice and vinegar, so 2-2 ratio), a bit of agave or honey, salt and pepper. Stir or shake vigorously. Taste for seasonings.

To assemble the salad I place the wedges prettily on a plate and then use a benriner to shave some fennel on top (it’s a nice touch flavor and texture-wise, but optional if you THINK you’re not a fan…hint…hint). I then chop some of the fennel fronds and sprinkle them on top. I’ve seen people add shaved cheese like ricotta salata or manchego to their citrus salads. I’m sure this is a delicious addition, but it also feels like gilding the lily a bit when the point of the salad is to enjoy the clean, bright, tart flavors. But do as you like!

Lastly I add the dressing on top–no stirring or tossing because you don’t want your citrus wedges to fall apart! Just drizzle the dressing right on top. I happened to have a jar of KEEPERS chimichurri (you can find a recipe HERE) in the fridge so I added this to the plate as well. Again, not necessary at all, but the herbal flavors were a surprisingly lovely compliment. If you have a loaf of good bread handy then you’ll want a slice or two for soaking up any leftover dressing on the plate, which is too good to waste.

Enjoy and stay warm!!


Read More

Comments Off on An Everyday Citrus Salad
Thursday, January 29th, 2015

Piece of Cake Story

IMG_4239

This past weekend was the big 4-0 birthday for two of my friends, and beforehand, I was enlisted by one of the party hosts to coordinate the dessert. Now, as many of you know, dessert (in particular making cakes), is not my strong point. As a reminder, here is what Conor’s 7th birthday cake looked like…

P1300029I mean, it did the job, but I wouldn’t call it a visual masterpiece. So I decided to delegate the making of the desserts (which also included two friends who baked over 100 cookies for chocolate chip cookie ice cream sandwiches, and these miniature s’mores that went so fast I didn’t even get one), specifically the making of the birthday cake. Which leads to the favor…

Lately I’ve found myself embracing the barter economy more and more (this will be the topic of another post in the near future) and that includes trading favors and food for services from multi-talented friends. So for the cake, I reached out to my very gifted CSA farmer, Bennett Haynes of Ralston Farm, who is spending the winter season as a pastry chef apprentice at a swanky new restaurant called Jockey Hollow Bar and Kitchen. Luckily for Bennett, the pastry program at Jockey Hollow is being run by Andrea Lekberg, who owns and runs one of the loveliest little bakeries around, The Artist Baker. After sending out my dessert S.O.S, Andrea gamely agreed that the birthday cake could be Bennett’s pastry “homework” for the week. After sharing a few details (a garden theme for the decorating, since the birthday friends share a vegetable patch; no chocolate), Bennett got to work, and I eagerly awaited the cake.

IMG_4237Here’s Bennett delivering his homework, which ended up being a phenomenal 3-tiered buttermilk cake (using Ralston Farm eggs) with a citrus-cardamon jam filling and a rich frosting which everyone agreed was the best frosting they’d ever tasted. It tasted as good as it looks and combined the best of professional pastry making with the thoughtfulness of something homemade (and everyone was spared my janky, sparkly blue, single-tiered brownie thing). So thank you Bennett and Andrea! And may I suggest exchanging your skills in the kitchen (or elsewhere…get your mind out of the gutter!) for something wonderful sometime soon?

Read More

Comments Off on Piece of Cake Story
Monday, January 26th, 2015

Another kind of chicken salad…

IMG_4106 So clearly I’ve got chicken on the brain lately, because I’m cooking and eating it for pretty much every meal. It’s a full on craving, and cravings are interesting, aren’t they? Why are there certain ingredients we just need in our bodies all of the sudden? I’ve had spates where all I wanted was turkey sandwiches; then another time it was an addition to smoked salmon for breakfast, lunch and dinner; and more recently citrus (fresh pink grapefruit in the morning, tangerines for snacks, cara cara and fennel salads…). I’m sure there’s some science behind these craving-mineral or vitamin deficiencies perhaps (yes, I play a doctor on tv), but right now it’s all about poultry so why not share that craving with you?

My last post was about assembling a classic chicken salad sandwich using the wonderful organic birds my supermarket is now offering. Today I’m featuring a different kind of chicken salad: Using your leftovers to make a hearty lunch salad. Any roast chicken will do for this, but I’m in love with a recipe from My Paris Kitchen, a newish cookbook from the Paris-based food writer David Lebovitz. The recipe is for Poulet a la Moutarde, or Mustard Chicken, and it’s a classic French dish for braising chicken thighs or parts with wine and flavoring it with a combination of dijon mustard, bacon, thyme, creme fraiche…resulting in a tender and intoxicating bird.

For dinner we eat the warm chicken over buttered noodles and then any leftovers go over a salad, like the one pictured above: Baby spinach, feta, sliced radish (another ongoing craving), a vinaigrette of red wine vinegar-shallots-maple syrup, a nice hunk of bread, and of course the chicken. It’s so simple, so satisfying. I might make it again today.


Read More

Comments Off on Another kind of chicken salad…